Setting up a Dual Portal
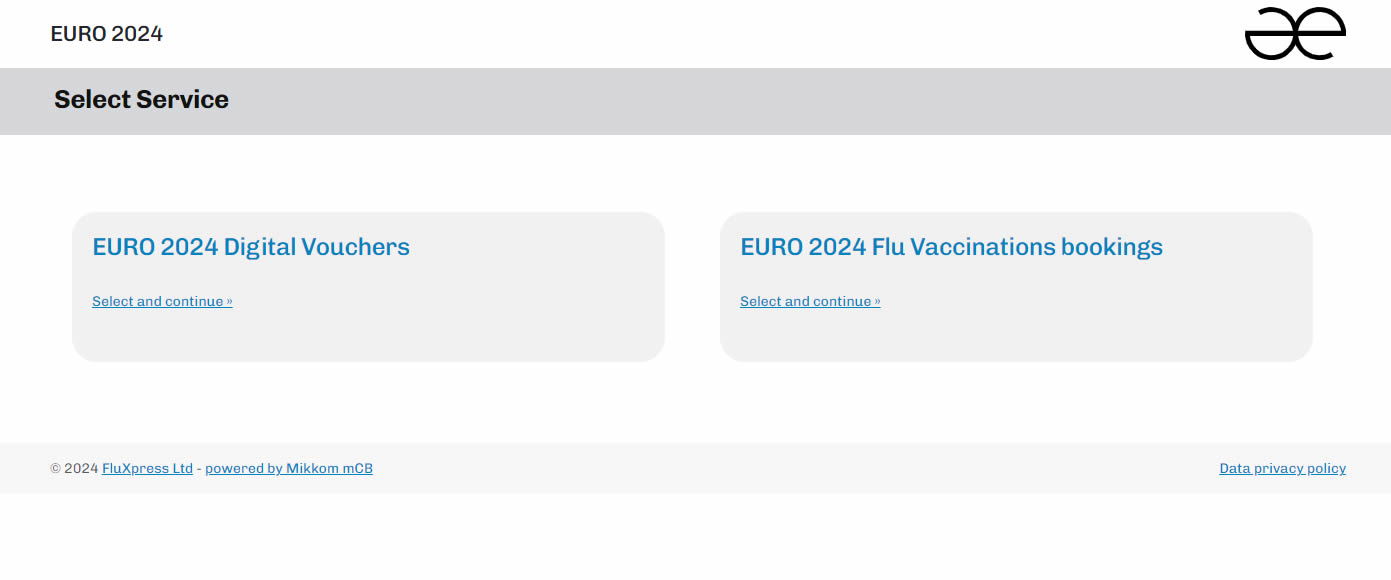
The purpose of this tutorial page is to instruct admins regarding how a Dual Booking Portal should be set up. A Dual Portal is a Flu-Xpress Booking Portal that gives users the choice of opting between several Booking Services.
Step 1: Create a new service
The first step is to define the new service that you will want to be selected in the dual portal, if you have not already defined it
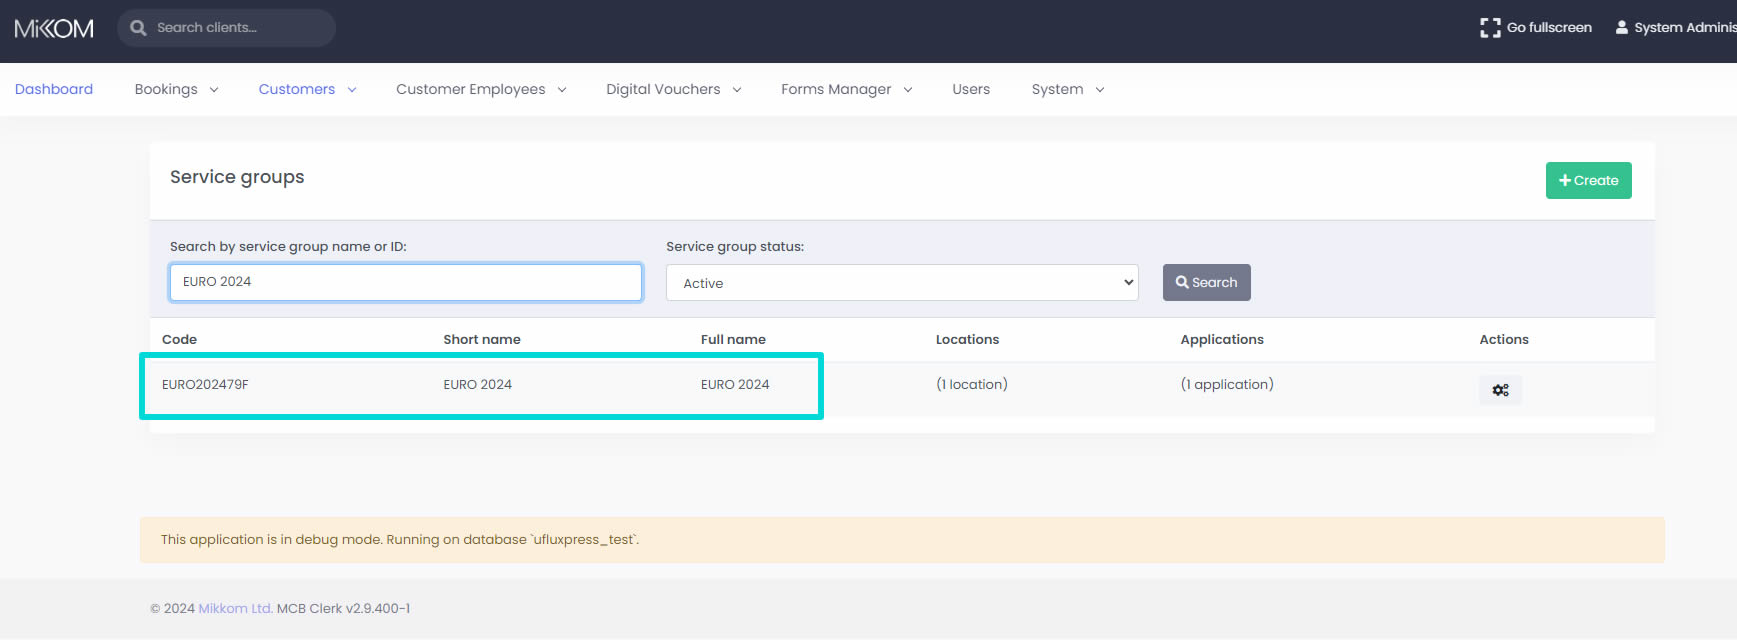
To create a new service, first go to the "Customers" page. Then find your customer using the search function and click on the customer name in the list of results.
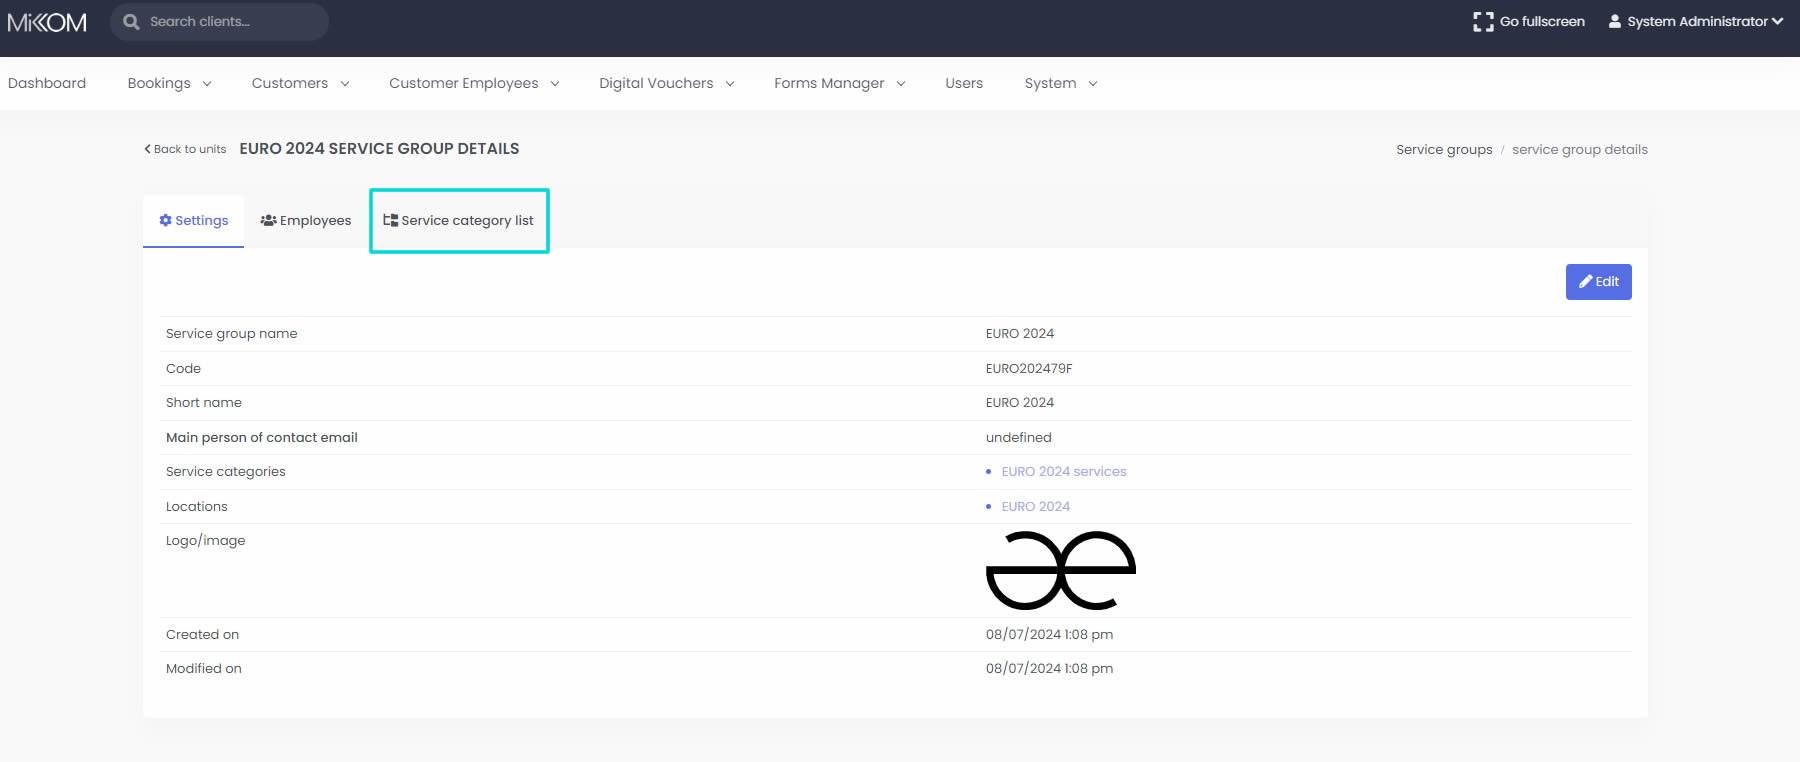
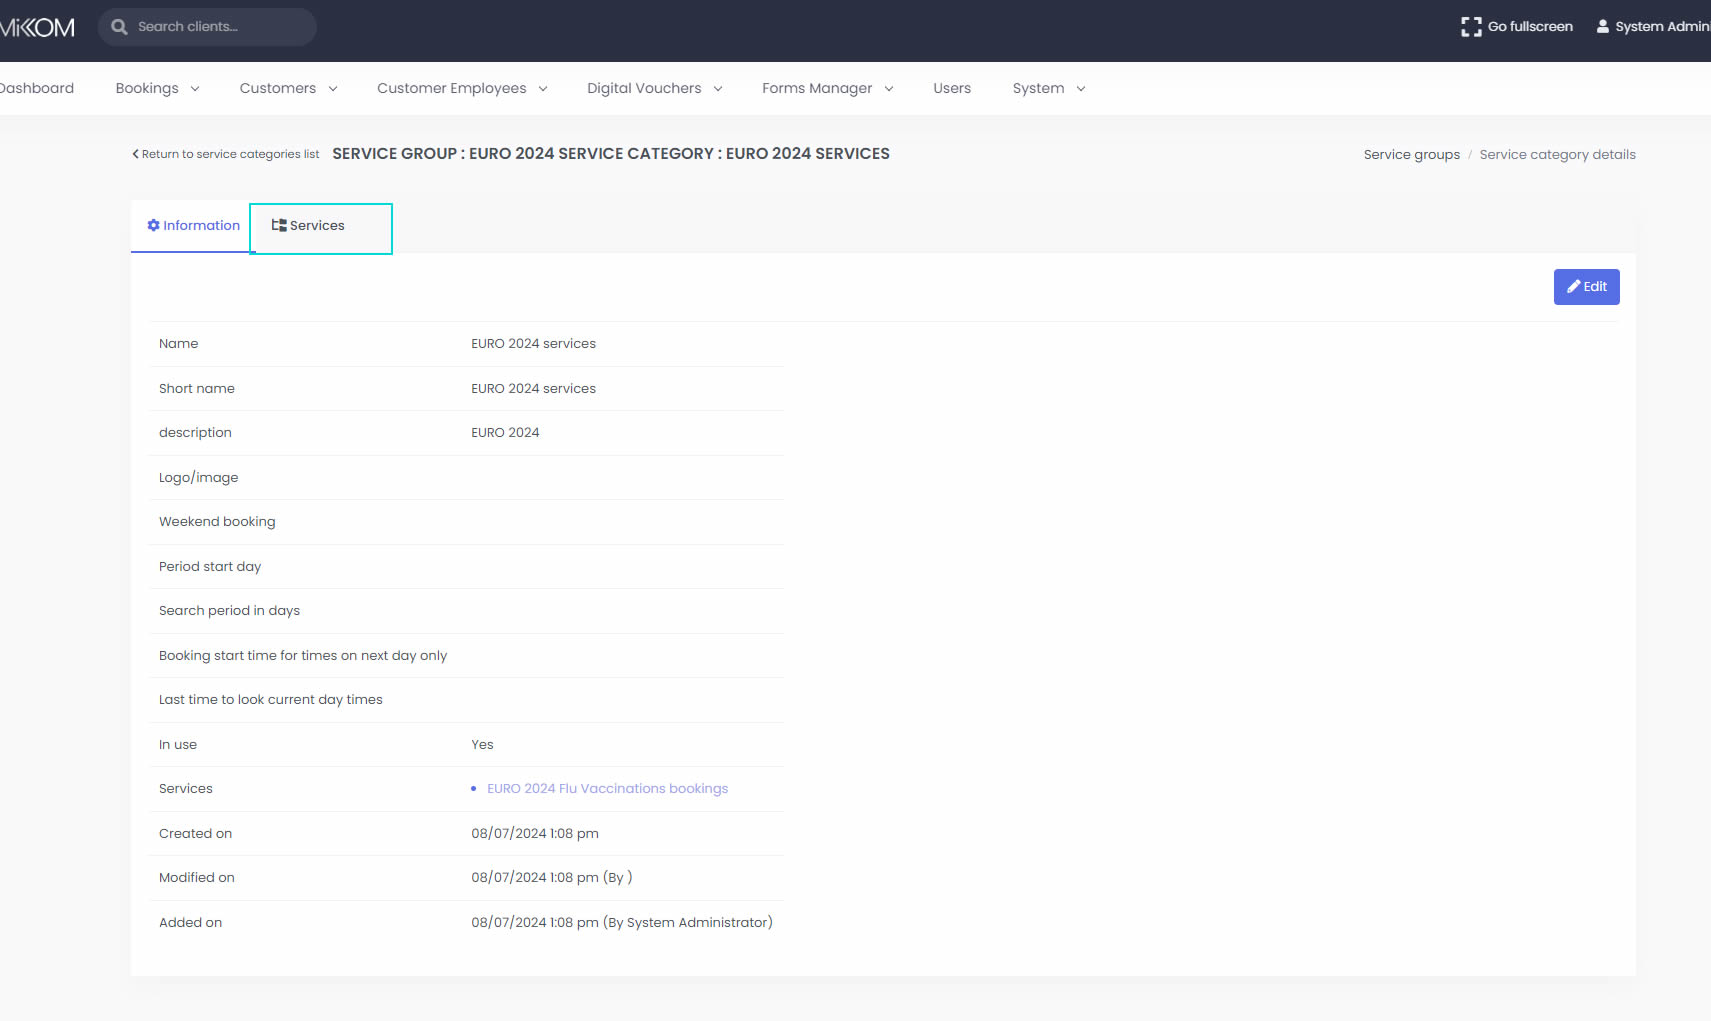
There you will be able to find a tab called "Service Category list". Click on that tab and then click on the name of the Service Category displayed there.
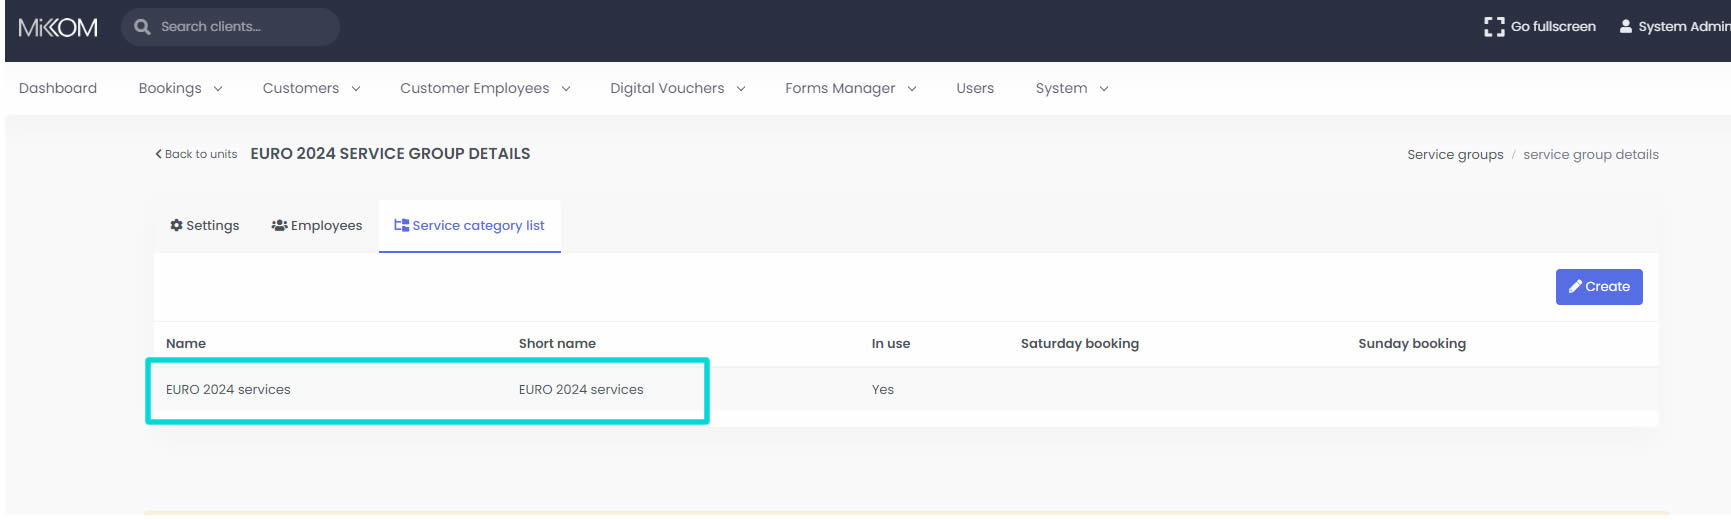
On the Service Category page you will find a "Services" tab. Click that and then a "Create" button will be displayed, that allows you to create a new service for this customer.
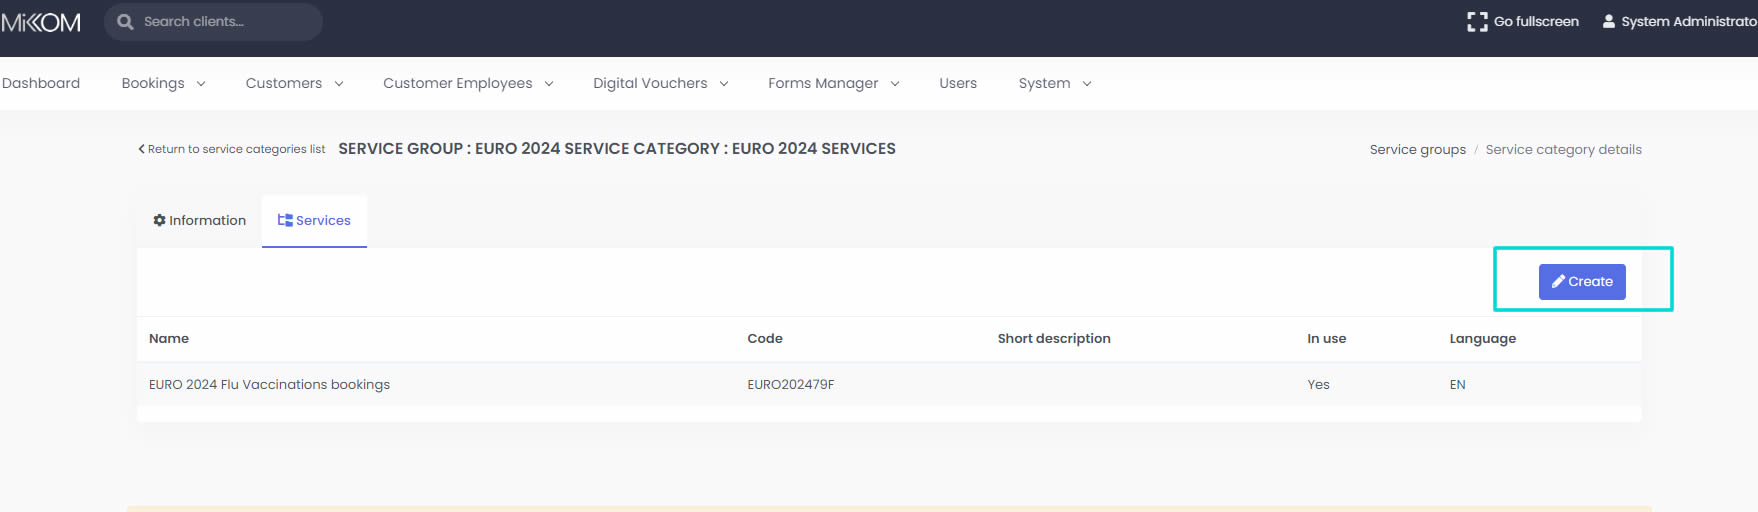
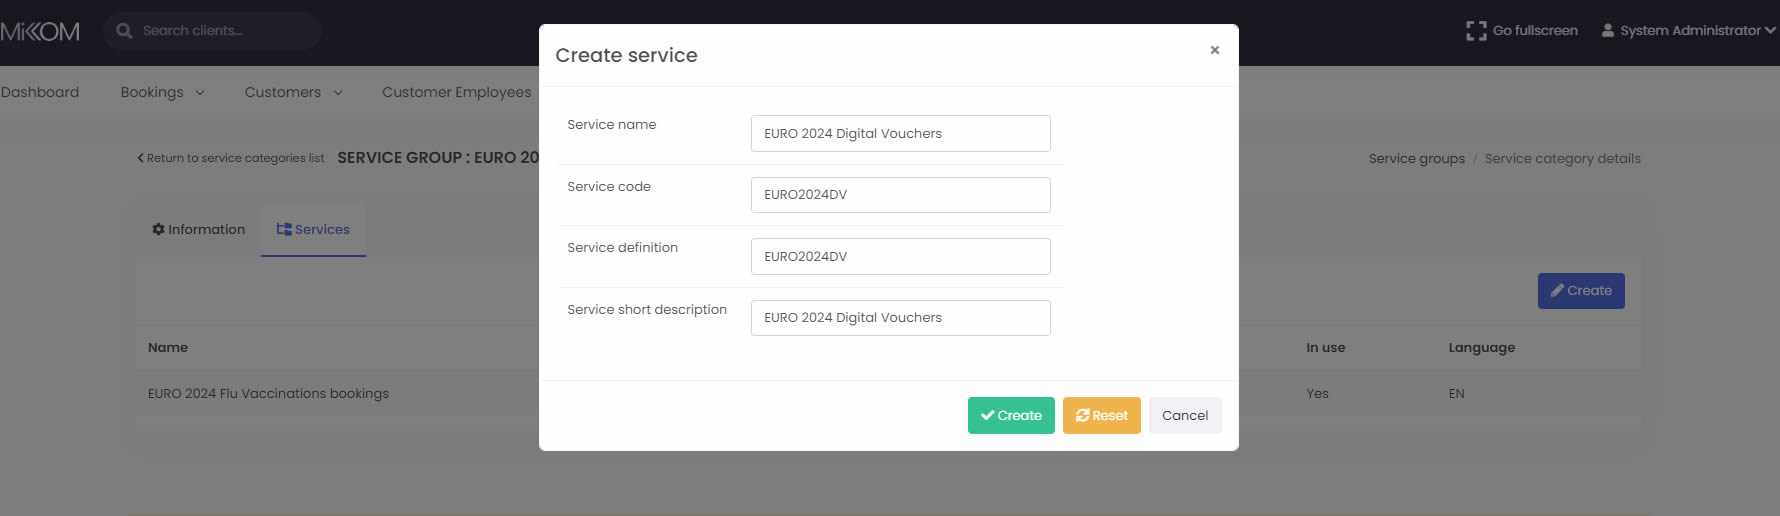
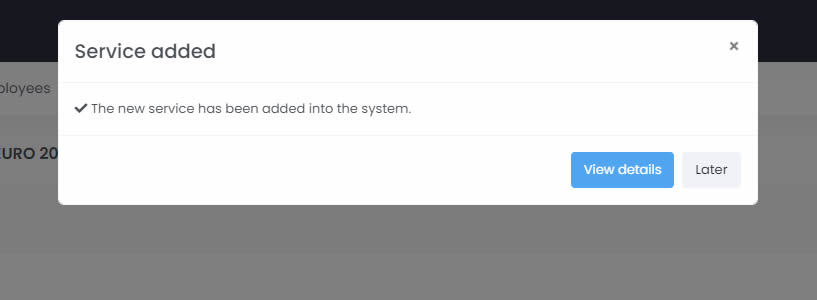
Fill in all the details requested in the form and press the green "Create" button. The service will be created and a "View Details" button will be shown, if the service has been correctly inserted into the system.
Step 2: Configure the new service
Clicking the "View details" button will take you to the configuration page for this new service. Make sure to go to the "FluXpress settings" tab and configure all the necessary values there.
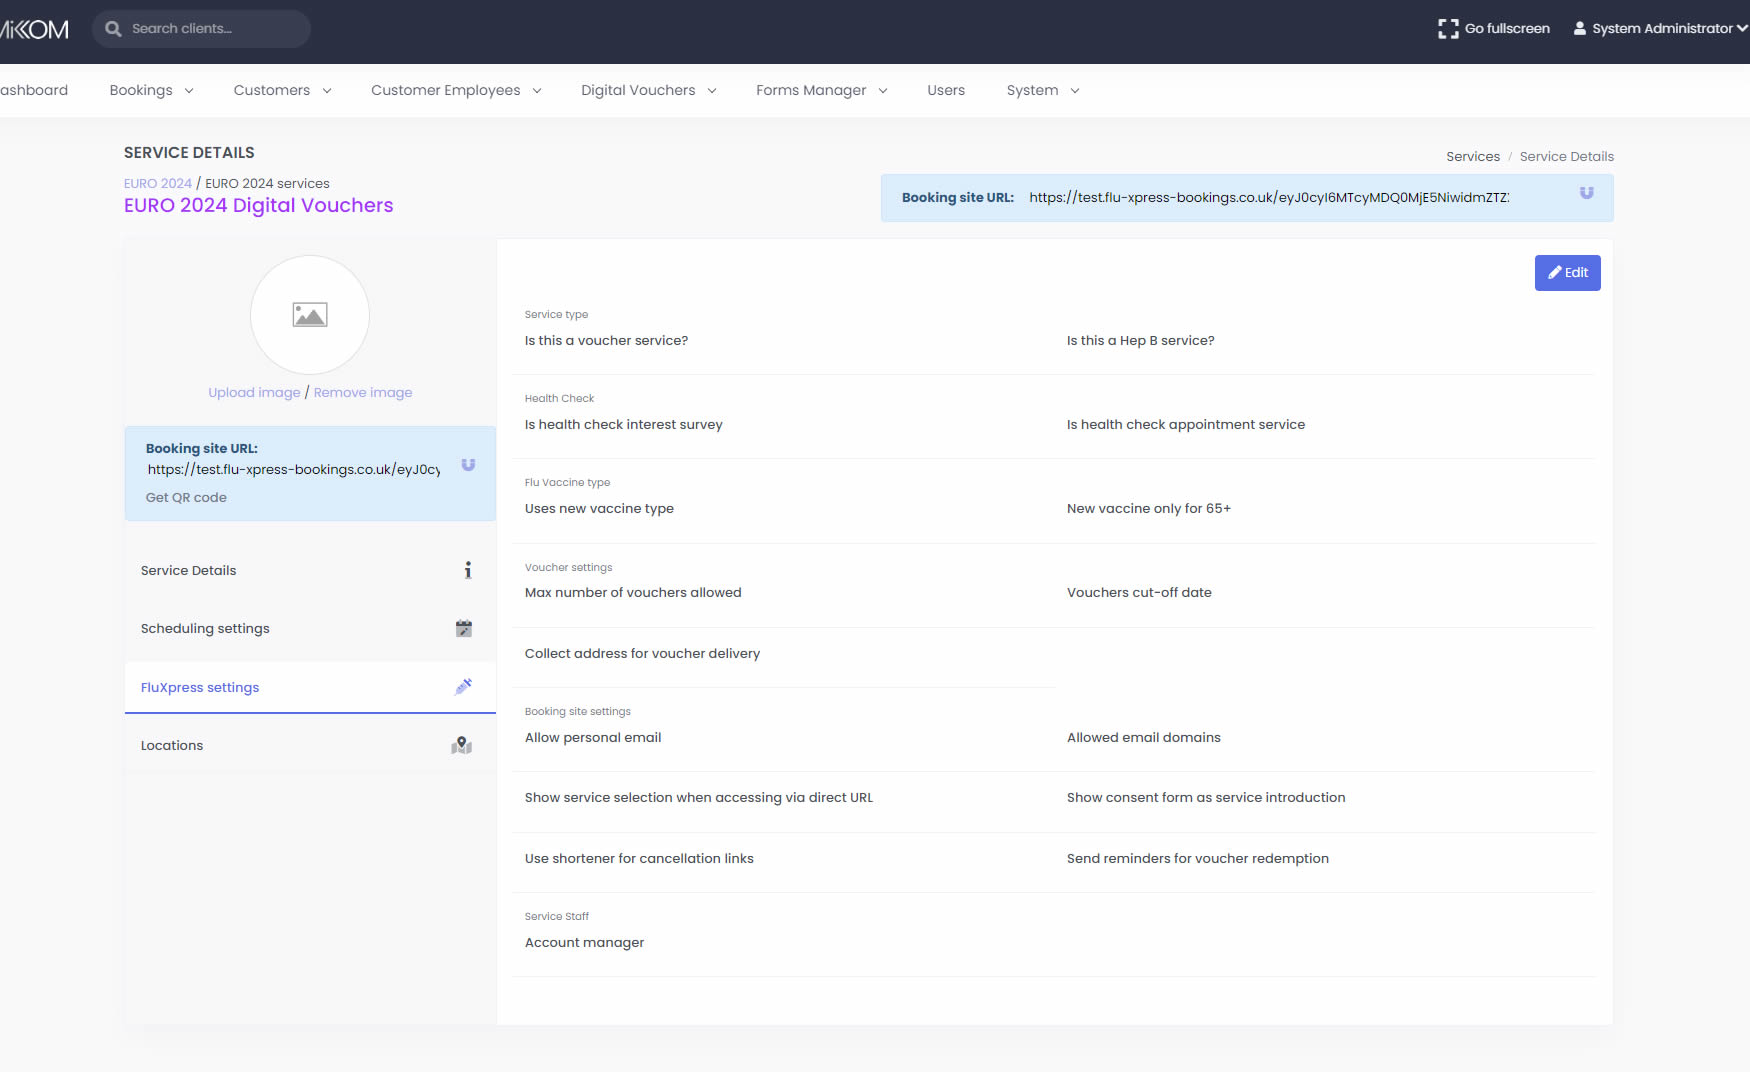
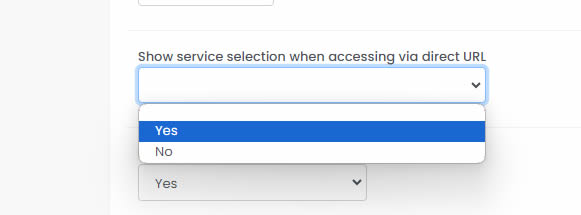
Make sure the "Show service selection when accessing via direct URL" is set to "Yes" on both the new and the previously existing service.
Step 3: Define a location to be used with the new service
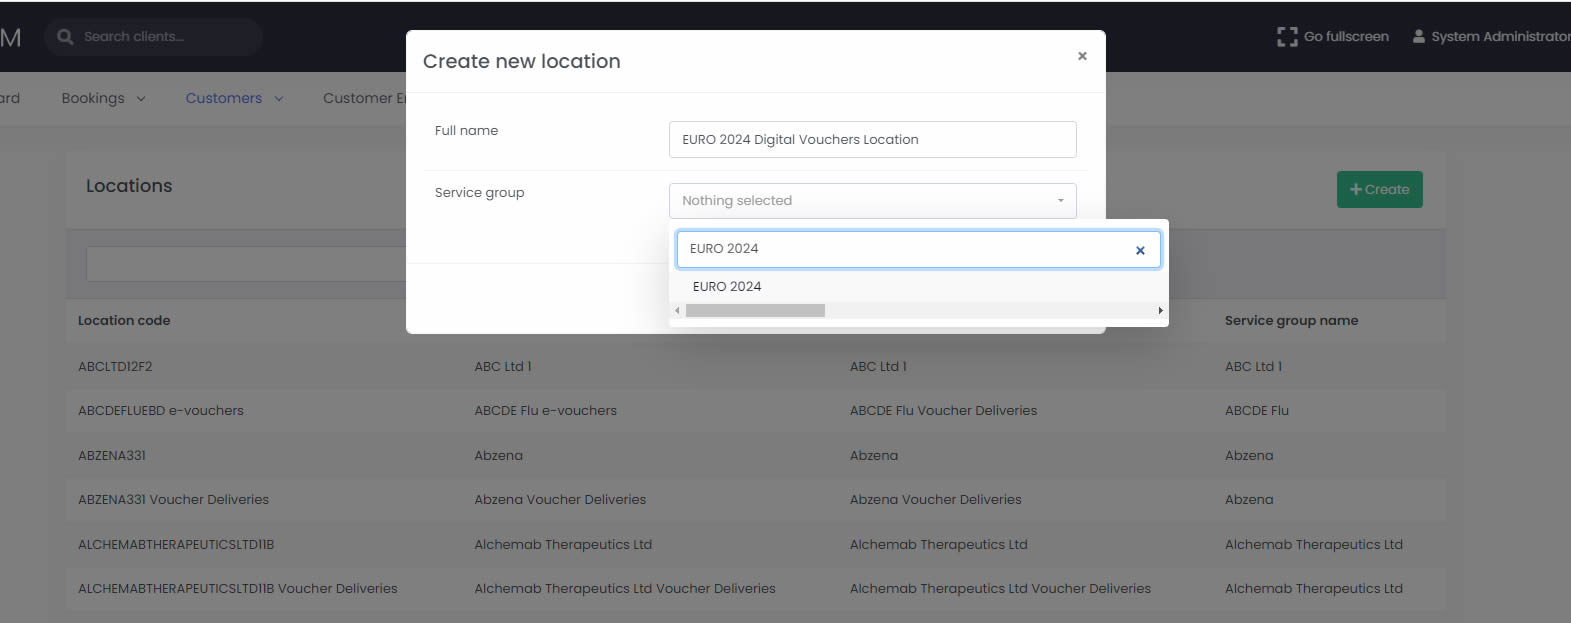
Next we will have to define a new Location in order for this Service to operate. It does not matter if this is a Voucher Service. A location is still needed as part of the way the system operates. in order to do that, go to the "Locations" page and click on the green "Create" button. Specify a name for the new location (we recommend that an easily distinguishable name is used) and in the "Service group" field search for the Customer for which you are setting up the dual portal.
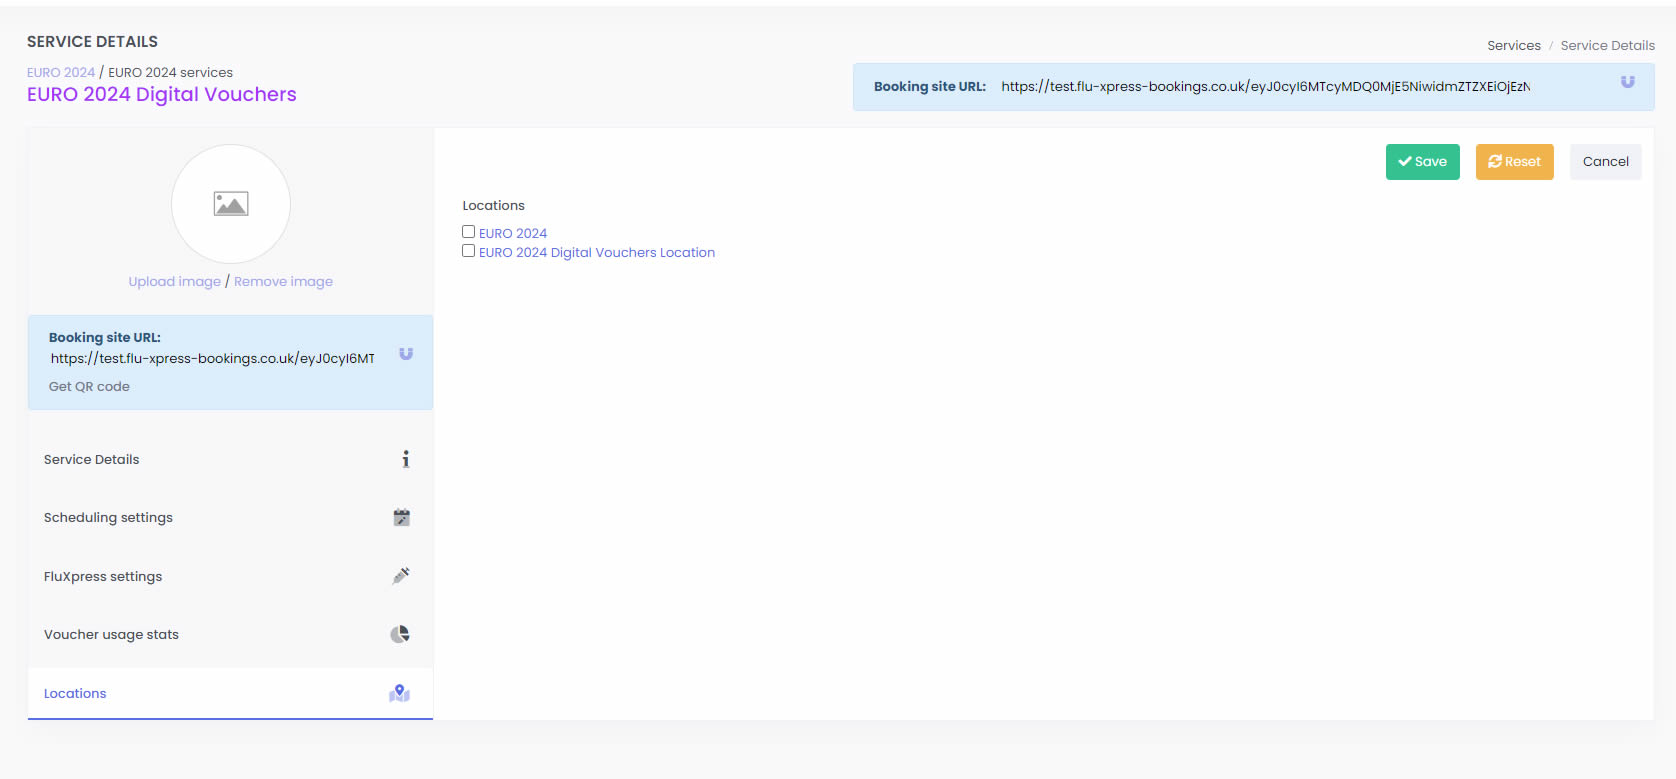
Now return to the "Service Details" page for that new service which you had created. Go to the "Locations" tab on said page and click "Edit". Tick the checkbox for the Location that you have just created in order to be used for this service and then click the "Save" button.
Step 5: Check that the Booking Portal is displaying all the Services
The Dual Portal setup process is now complete and you can access the booking site using the service link of either of the two services.